CI/CD: Running Jenkins Pipelines on Kubernetes Made Simple
Many organizations rely on Jenkins as their go-to CI/CD automation tool, while Kubernetes serves as the preferred platform for running applications. Jenkins pipelines are incredibly versatile, allowing us to handle a wide range of tasks, including building applications, deploying them, and even orchestrating production code upgrades. Let's explore this synergy with a practical example.
In traditional setups, Jenkins pipelines operated on worker nodes, orchestrated by the master node. However, in the containerized landscape, allocating additional virtual machines solely for running Jenkins pipelines isn't practical. Instead, we leverage existing Kubernetes clusters to efficiently schedule our pipelines within containers.
To facilitate this integration, we employ the Kubernetes Plugin for Jenkins configuration.
 Suhas Adhav
Configure Kubernetes Cloud in Jenkins
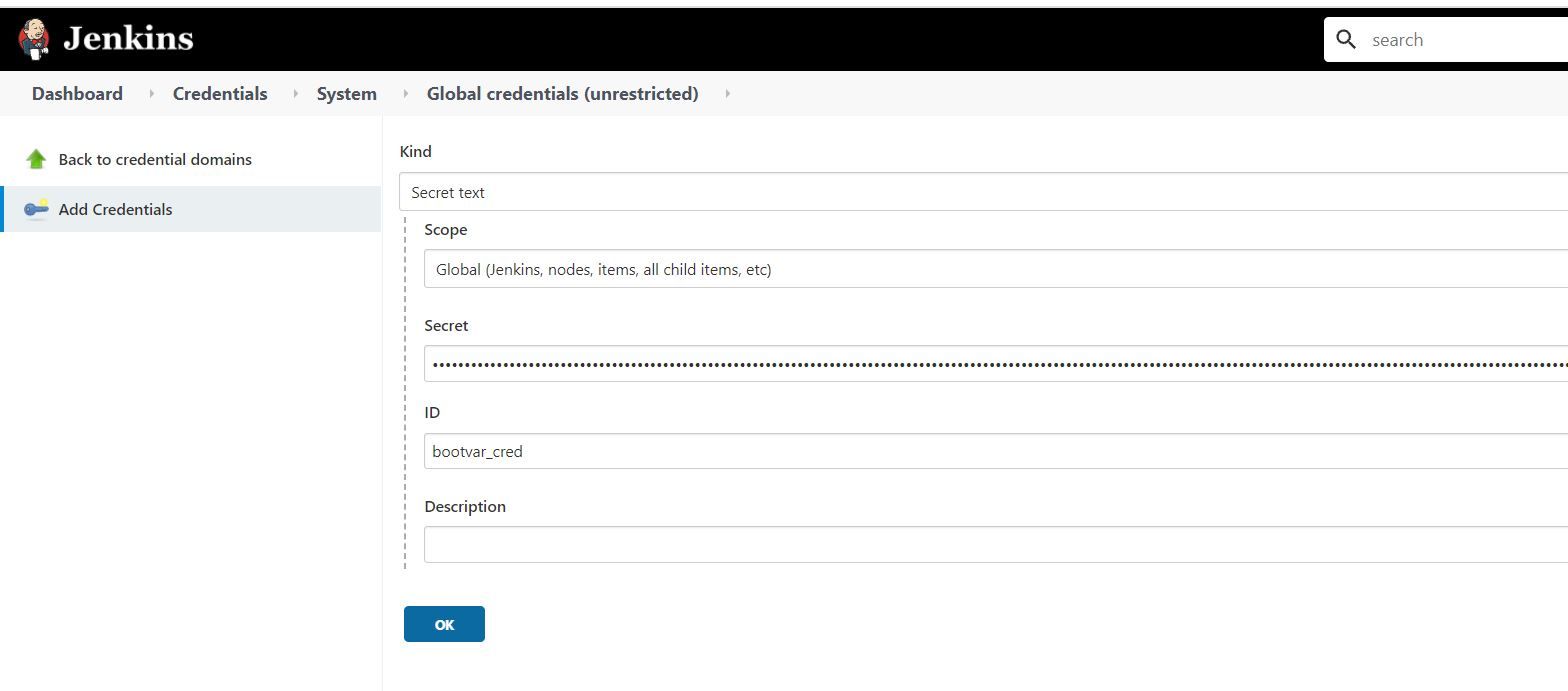
Once Jenkins and Kubernetes plugin are installed it's time we connect it with our Kubernetes cluster. For configuration we need access to Kubernetes cluster with credentials like username and password or secret token to access the cluster.
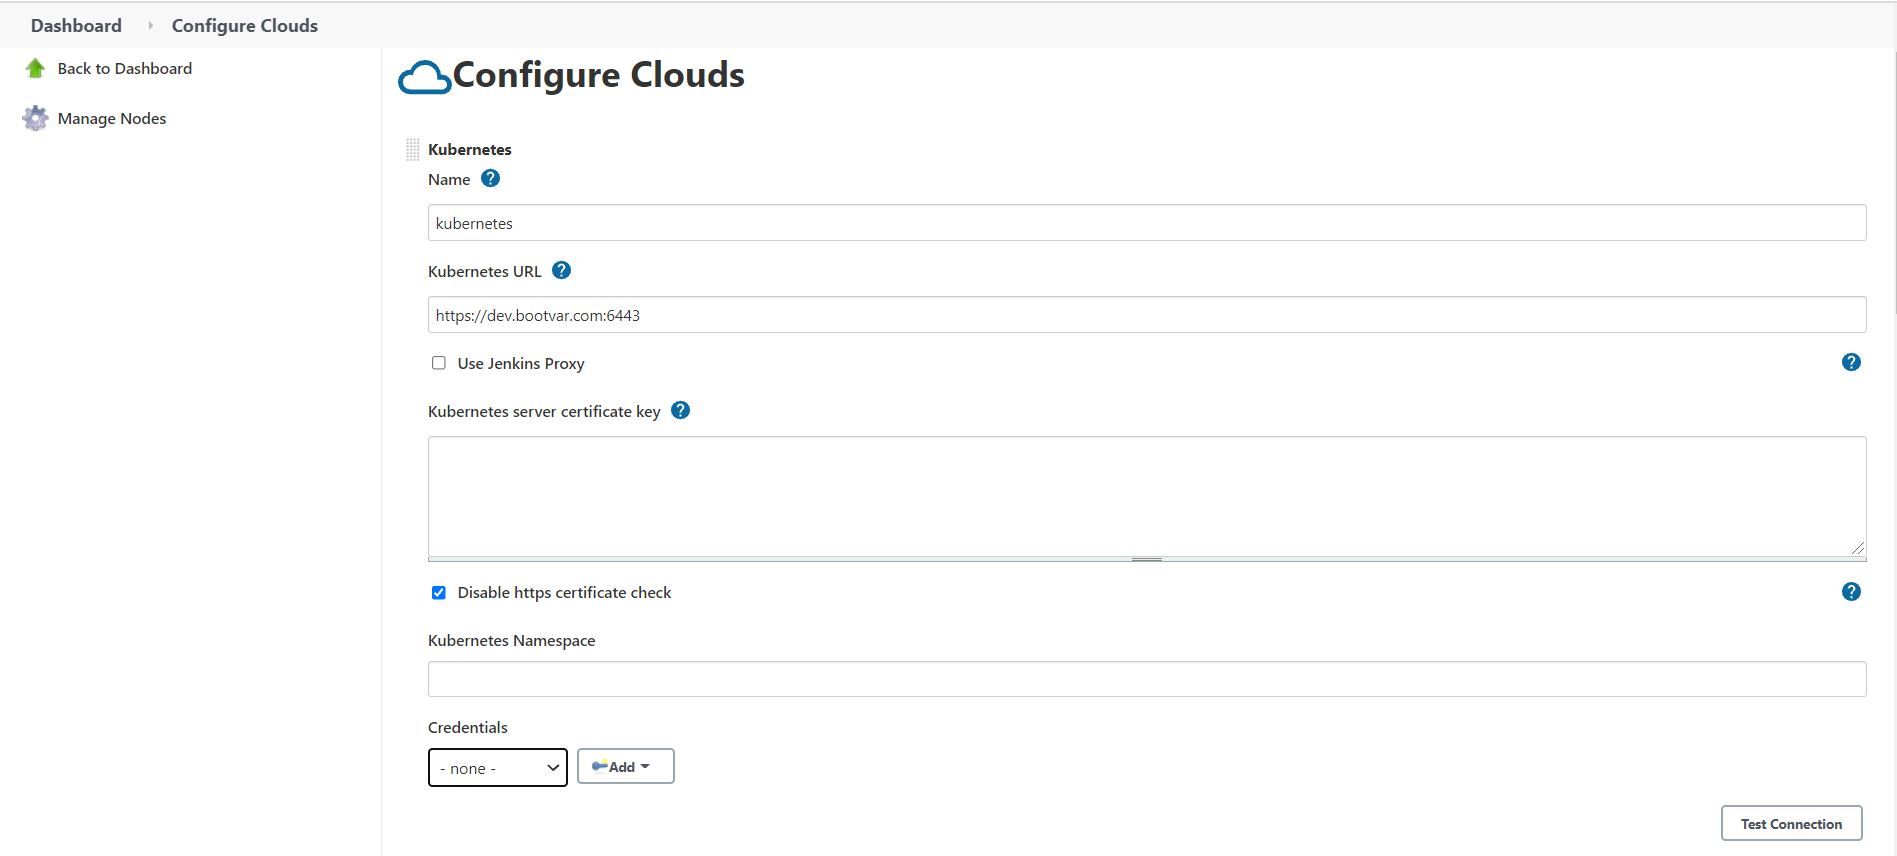
Go to configure page of Jenkins you will see "Configure clouds" section and add details:
- Name of your cloud: When you add multiple clouds Name will be used to run pipeline on particular cloud.
- Kubernetes URL: Kubernetes API URL, can be found in Kubernetes configuration details
- Server certificate key: Server key for the Kubernetes certificate. For testing you can disable https certificate check instead of certificate key.
- Credentials: You can add credentials in "Manage Credentials" section. For secret use secret text as the credential type.
- After filling all the details you can test connection if it's successful, then we can proceed further.
- Add Jenkins URL, Jenkins Tunnel and keep timeout parameters as it is, you can tweak these parameters going further according to your needs.
- Note: Jenkins tunnel should not have protocol mentioned
We can add multiple clouds Kubernetes plugin supports multiple flavors of Kubernetes including Openshift.
Suhas Adhav
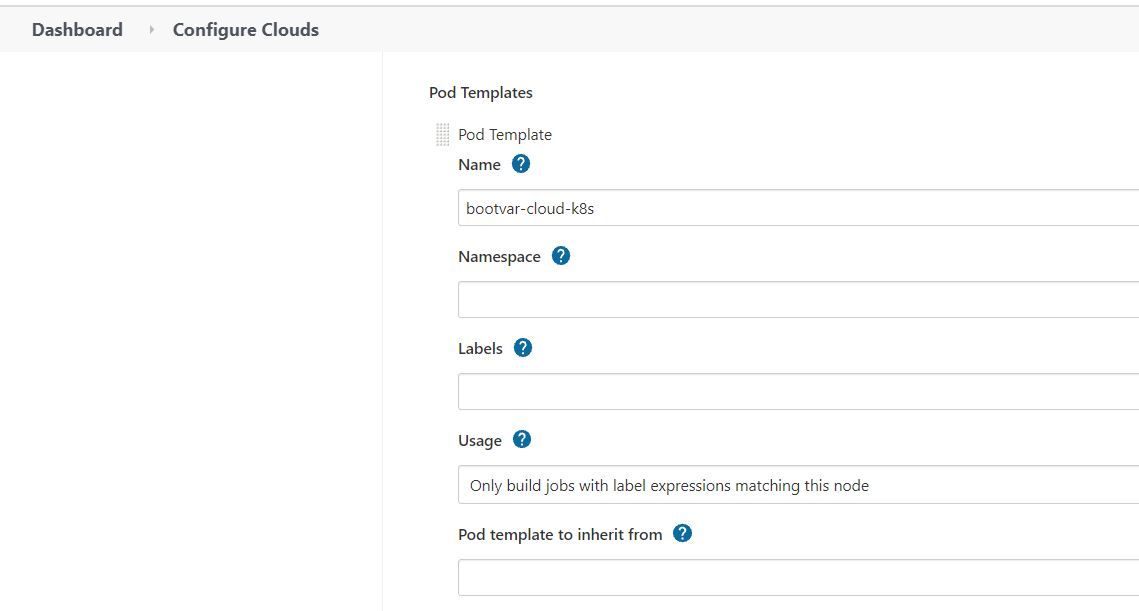
Configure Pod Template
Pod template specifies how your pod will look like, what labels it will have and in which namespace it will be created the cluster.
- Name: Name of the pod
- Namespace: In which namespace pod should be created. Keeping it blank as we can override this in pipeline.
- Labels: Custom Labels for spawn pod
Configure Container Template
Each pod can have multiple containers. By default Jenkins will spawn jnlp container with default image which will handle communication between Jenkins and the Pod.
If you want to use custom agent image you can add container with name "jnlp" with image details.
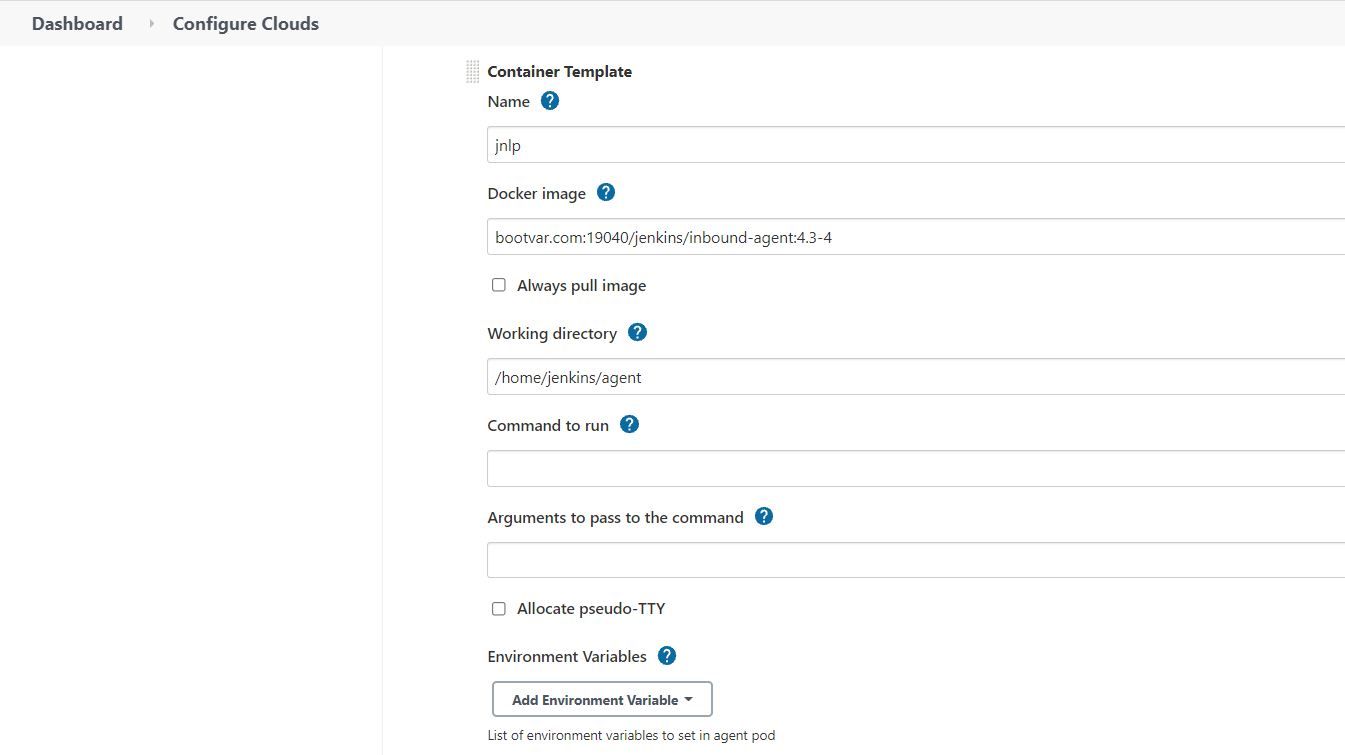
Add custom environment variable if needed for the container.
Once this configuration is complete now we can head over to creating a pipeline which will run on this configured cluster.
Create a test Pipeline
Now create a pipeline with pipeline script using new item wizard. Use "Pipeline" as type and go further to configure it.

In "Advanced Project Options" select "Pipeline Script" and paste code given below in the snippet.
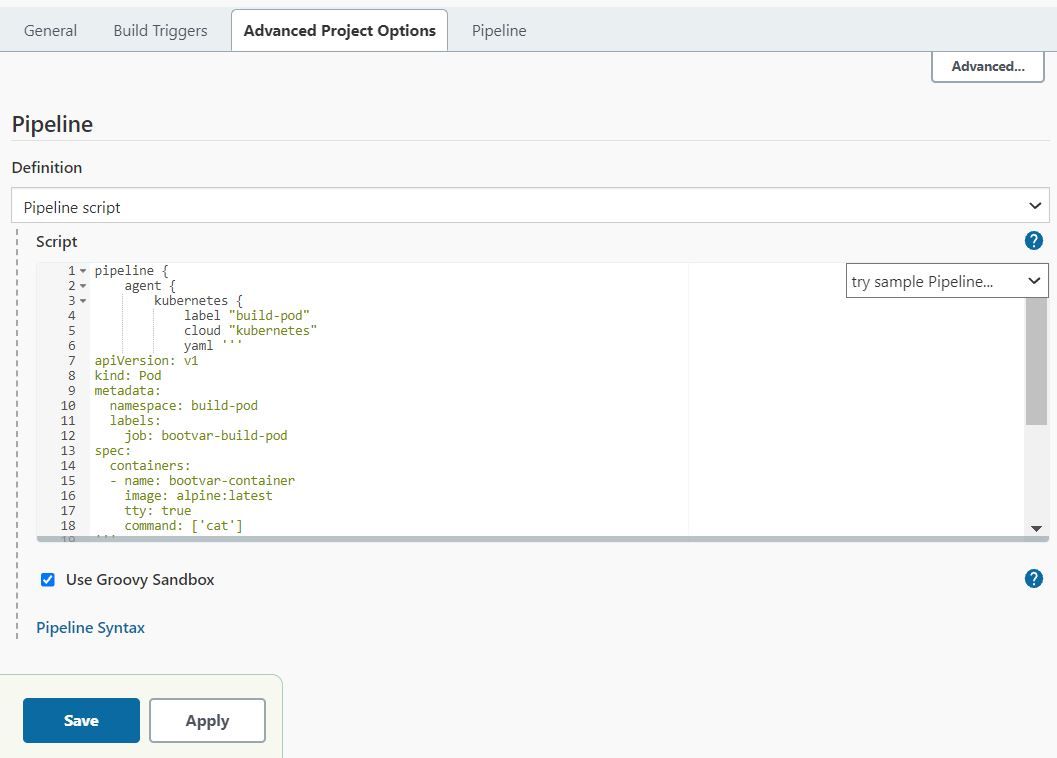
Below declarative code can be used to create a test pipeline.
Note: cloud directive specifies name of the cluster we configured.
pipeline {
    agent {
        kubernetes {
            label "build-pod"
            cloud "kubernetes"
            yaml '''
apiVersion: v1
kind: Pod
metadata:
  namespace: build-ns
  labels:
    job: bootvar-build-pod
spec:
  containers:
  - name: bootvar-container
    image: alpine:latest
    tty: true
    command: ['cat']
'''
        }
    }
    stages {
        stage("First") {
            steps {
                container("bootvar-container") {
                    sh "ls -lart"
                }
            }
        }
    }
}
Now run the pipeline it should start pod on the Kubernetes cluster.
PS C:\Users\Suhas\Documnts> kubectl get pods --namespace=build-ns
NAME                                    READY   STATUS      RESTARTS   AGE
build-pod-6c58b4d8bb                    1/1     Running     0          3s
Conclusion
This guide has unveiled the dynamic partnership between Jenkins and Kubernetes, pivotal forces in modern software development. With Jenkins pipelines as versatile tools for application development and deployment, we've demonstrated their prowess through practical examples.
Member discussion